7 Simple Steps to Set Up Facebook Conversion API in WooCommerce
Updated December 14, 2022

Social media advertising is a powerful tool that can help you gain valuable customer insight as well as increase your exposure and conversions. Consider the potential of Facebook's astounding 2,910 million monthly active users, making it the largest social media platform by far.
However, new privacy laws and device software updates can make it difficult to gather marketing data. For example, the iOS 14 update gives users the choice to turn off tracking from apps. This can skew data and give you an unclear picture of how your marketing campaigns are performing.
This is where Facebook Conversions API comes in. You can conduct in-app tracking by sending web events to the Facebook server, thus allowing you to gather data and optimize conversions.
To set up this API on your Woocommerce store, you can simply install and authorize the Facebook for WooCommerce Plugin.
» Do you have a Shopify store? Use Facebook Conversions API for Shopify too
1. Log into WordPress & Add New Plugin
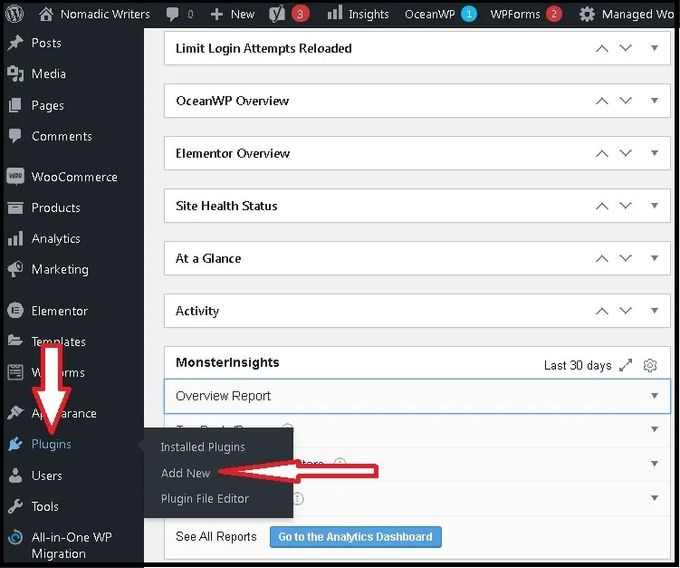
Log in to your WordPress admin and navigate to Plugins on the left-hand side panel and select Add new.
2. Install the Facebook for WooCommerce Plugin
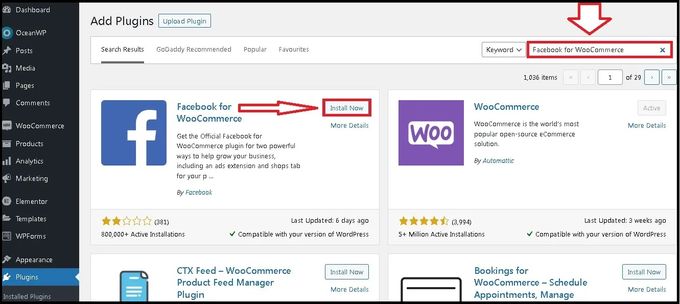
In the top right-hand side search box, search for Facebook for WooCommerce and select Install now on the relevant plugin.
3. Activate the Facebook for WooCommerce Plugin
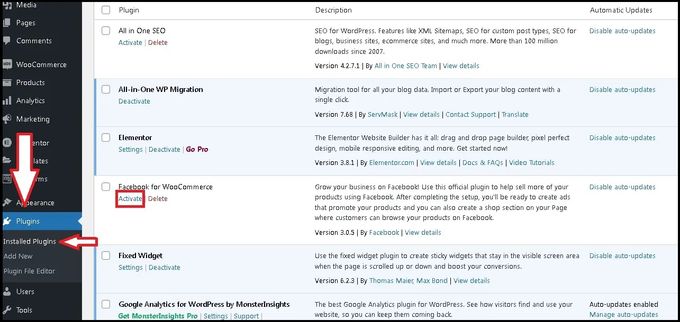
Once the plugin is installed, select Activate from the plugin installation window.
Alternatively, you can navigate to Plugins > Installed Plugins, and then find and activate the app from your plugin list.
4. Authorize Integration
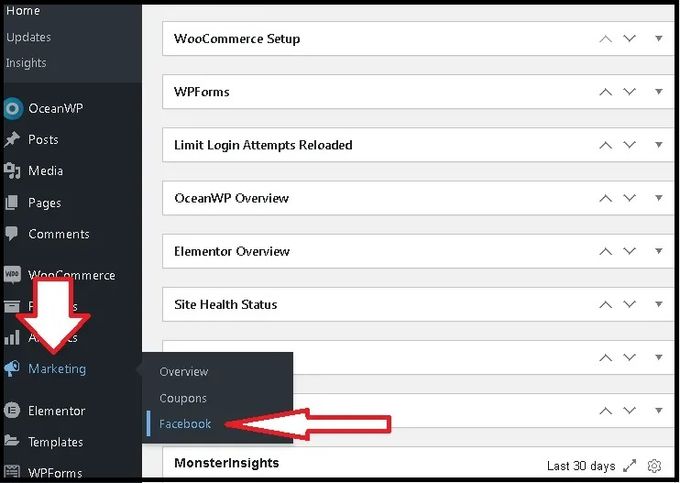
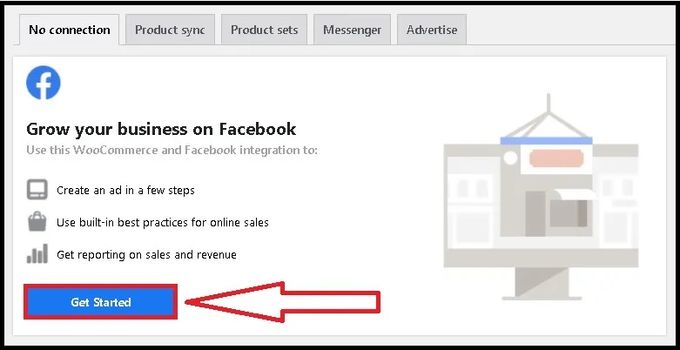
Once activated, you must grant permission for integration. Navigate from your WordPress Admin to the Marketing page on the left-hand panel and select Facebook.
5. Select "Get Started"
From the window that opens up, select Get Started.
6. Continue & Confirm Settings
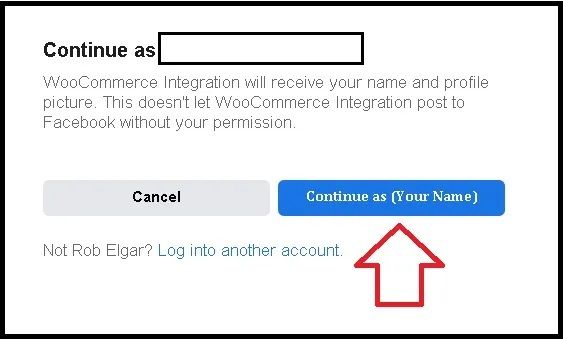
Confirm that you're logged into the correct Facebook account.
Select Continue when you're prompted to grant permissions for the plugin and to confirm the settings. Finally, select Next when you're asked what WooCommerce Integration is allowed to do.
7. Authorize the Plugin Through Facebook
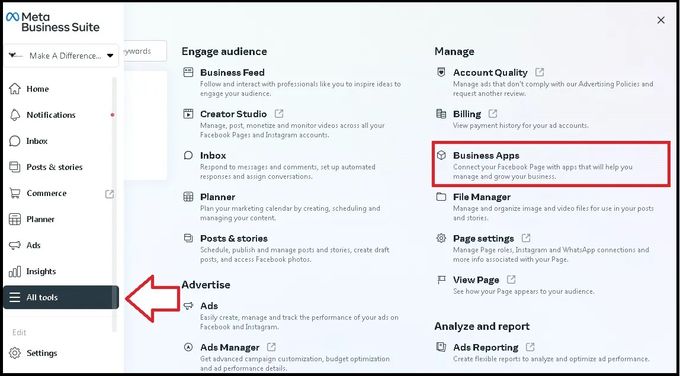
From your Facebook Home Page, navigate to the Meta Business Suite tab on the right-hand side, then All tools > Business Apps.
Under the E-commerce tab, search for and select WooCommerce Integration.
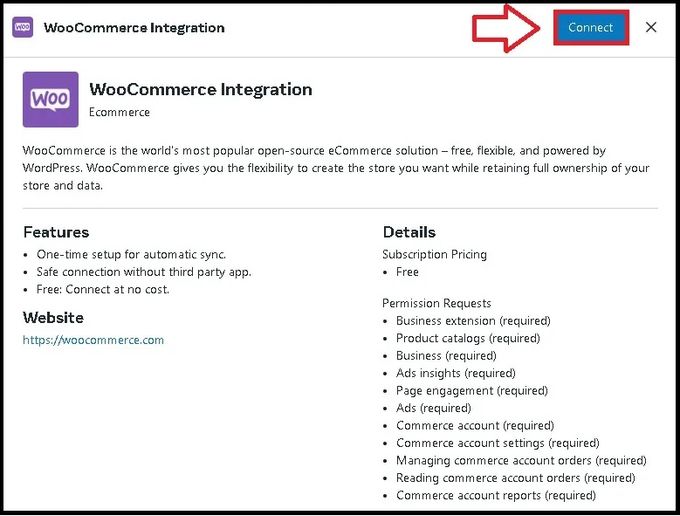
From the popup window, select Connect.
Start Gathering Better Data
By utilizing Facebook Conversion API in your WooCommerce store, you'll be able to gain an accurate understanding of how your customers behave, thus allowing you to make improvements, optimize marketing campaigns, and ultimately increase your conversions.
» Unsure how to interpret your data? Let BeProfit help


